Phenix – Particle Animation Powerhouse for Blender
(Documentation work in progress: 2026-05-19)
Introduction:
Phenix is a GPU-native particle system for Blender — the whole simulation runs on the GPU (WGPU compute shaders) for orders-of-magnitude more particles than a CPU pipeline. Stack forces, constraints, fluids and procedures in a node graph: every effect composes additively, so impressive animations come out with minimal effort. I build it solo in Rust + WGSL + Python.
Here are some tutorials to discover the add-on (this does not replace reading the documentation, which is more detailed): Youtube video tutorials
What changed: CPU → Full GPU rewrite
Phenix has been rebuilt from the ground up. The simulation, previously running on the CPU inside a Rust thread, now runs entirely on the GPU through WGPU. Emission, integration, neighbor search, constraints, fluids, collisions and procedures are all evaluated by compute shaders; the Phenix nodes describe a graph of GPU dispatches plus a thin CPU command list.
- Scale: simulations now run with orders-of-magnitude more particles than the previous CPU pipeline.
- Stability: new constraint solver tuned for cloth, hair, ropes, jelly and chains, with ready-to-use material presets.
- Learn and build with AI: Phenix can talk to AI assistants like Claude (or any MCP-compatible tool). Ask the assistant to explain a node, build a starter graph or debug a simulation; it does the work inside your Blender session for you. See the dedicated section below.
- Mesh attributes: Geometry Nodes named attributes (
velocity,mass, customs) are read directly from the source mesh at emission time. - Hardware requirement: a GPU with up-to-date Vulkan / Metal / DX12 drivers. Apple Silicon and recent integrated GPUs are supported.
- WGSL shader templates are exposed through the new Custom Shader node for advanced users.
Previous versions: 2026-05-01 · 2026-04-29 · 2026-02-08 · 2024-09-17
GPU Architecture (v5):
A short tour of the three pieces of the v5 rewrite an artist actually sees: how the particle pool is sized, why stages have disappeared from the UI, and which nodes are new. The numerical solver, neighbor search and compaction passes are unchanged from the user point of view.
Particle pool — Manual or Automatic
The pool is the single GPU buffer that holds every particle of a system. It
is allocated once, before frame 1, and reused for the whole
simulation: no per-frame reallocation. Its capacity is driven by the
Pool Budget socket on the Particle System node:
-
Manual —
Pool Budget > 0. The value you type is the hard cap of the pool. Use this when you know the upper bound (bake budget, target memory) or when an automatic estimate would over-allocate (event spawners with bursty rates, recycling lifecycles). -
Automatic —
Pool Budget = 0(default). Phenix sums the declared capacity of every spawner in the graph (Particle Emitter, Spawner Primitive, Event Spawner) and uses that as the pool size. No tuning required for static graphs.
Plug a GPU Memory Profiler node anywhere in the tree to see the resulting pool size, the live active count, and the pool efficiency percentage. A persistently low efficiency in Automatic mode is a hint to switch to Manual and cap the pool yourself.
flowchart LR
  A[Particle System node] --> B{Pool Budget}
  B -- greater than zero --> C[Manual fixed pool]
  B -- zero default --> D[Sum spawner capacities]
  D --> E[Emitters plus Primitives plus Events]
  C --> F[Preallocate once on GPU]
  E --> F
  F --> G[Frame loop reuses pool]
Stages are now internal
In v4, every command node carried a stage (CONSTRUCTOR,
FRAME_CONSTRUCTOR, MODIFIER, FRAME_END,
…) that the artist had to assign with the [F]
shortcut. In v5 this assignment is automatic per node
category: a force is always a modifier, a constraint solver is
always a frame end, an emitter is always a constructor,
and so on. Node headers may still be tinted by stage colour for information,
but the assignment cannot be overridden. The [F] shortcut
has been re-purposed: it now opens the Frame Range editor,
which is the v5 replacement for stage-based sequencing. See
Flow Control — per-modifier frame range below.
New nodes — at a glance
v5 brings a wave of new nodes alongside the GPU rewrite. Grouped by family (the changelog at the bottom of this page lists each one individually):
- Spawners: Particle Properties, Spawner Primitive, Event Spawner.
- Commands: Turbulence, Constraint Advanced, Max Velocity, Follow Topo, Spline Follow, Merge-Split Collision, Custom Attribute.
- Custom Shader: WGSL kernel node with live compile and five ready-to-use templates.
- Math Procedures: Apply Procedure, Align, Blend States, Clip, Copy, Delete, Project, Sort, Surface Attach, Closest Point on Mesh, Distance to Mesh, CSV Sample, Neighbor Avg / Min / Max / Sum / Count / Closest.
- Filtering: Attribute Filter, Zone, Combine Filter with an explicit
MUL/OR/SUB/ADDoperation. - Profilers & viewers: GPU Memory Profiler, GPU Perf Profiler, 3D Plotter, Spreadsheet.
Installation and Setup:
- Navigate to Edit → Preferences → Add-ons → Install
- Choose the Phenix.zip file.
- Check the box labeled “Phenix” to enable the addon.
- Restart Blender to complete the installation.
Known issue on Windows: To uninstall the add-on, you first need to disable it, then restart Blender, and then uninstall it. Because of the way the OS handles dynamic libraries, it’s not possible to uninstall it while it’s enabled.
To access Phenix tools:
- Press Shift + F3
- Alternatively, click on the “Editor” tab and locate “Phenix Particle” in the General section.
General settings of Phenix:
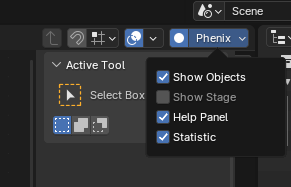
Show Objects
Toggle on/off to display only the objects
utilized in the simulation.
Statistic
Toggle on/off to view simulation statistics,
such as the number of emitters, particles, objects, etc., used in the
simulation.
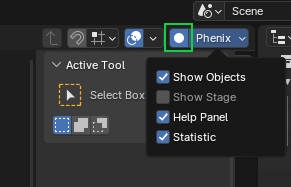
Record
Globally disable/enable the simulation.
General workflow
Setting up the layout window
Setting up the layout window like in this way it is much easier to create particle animations.
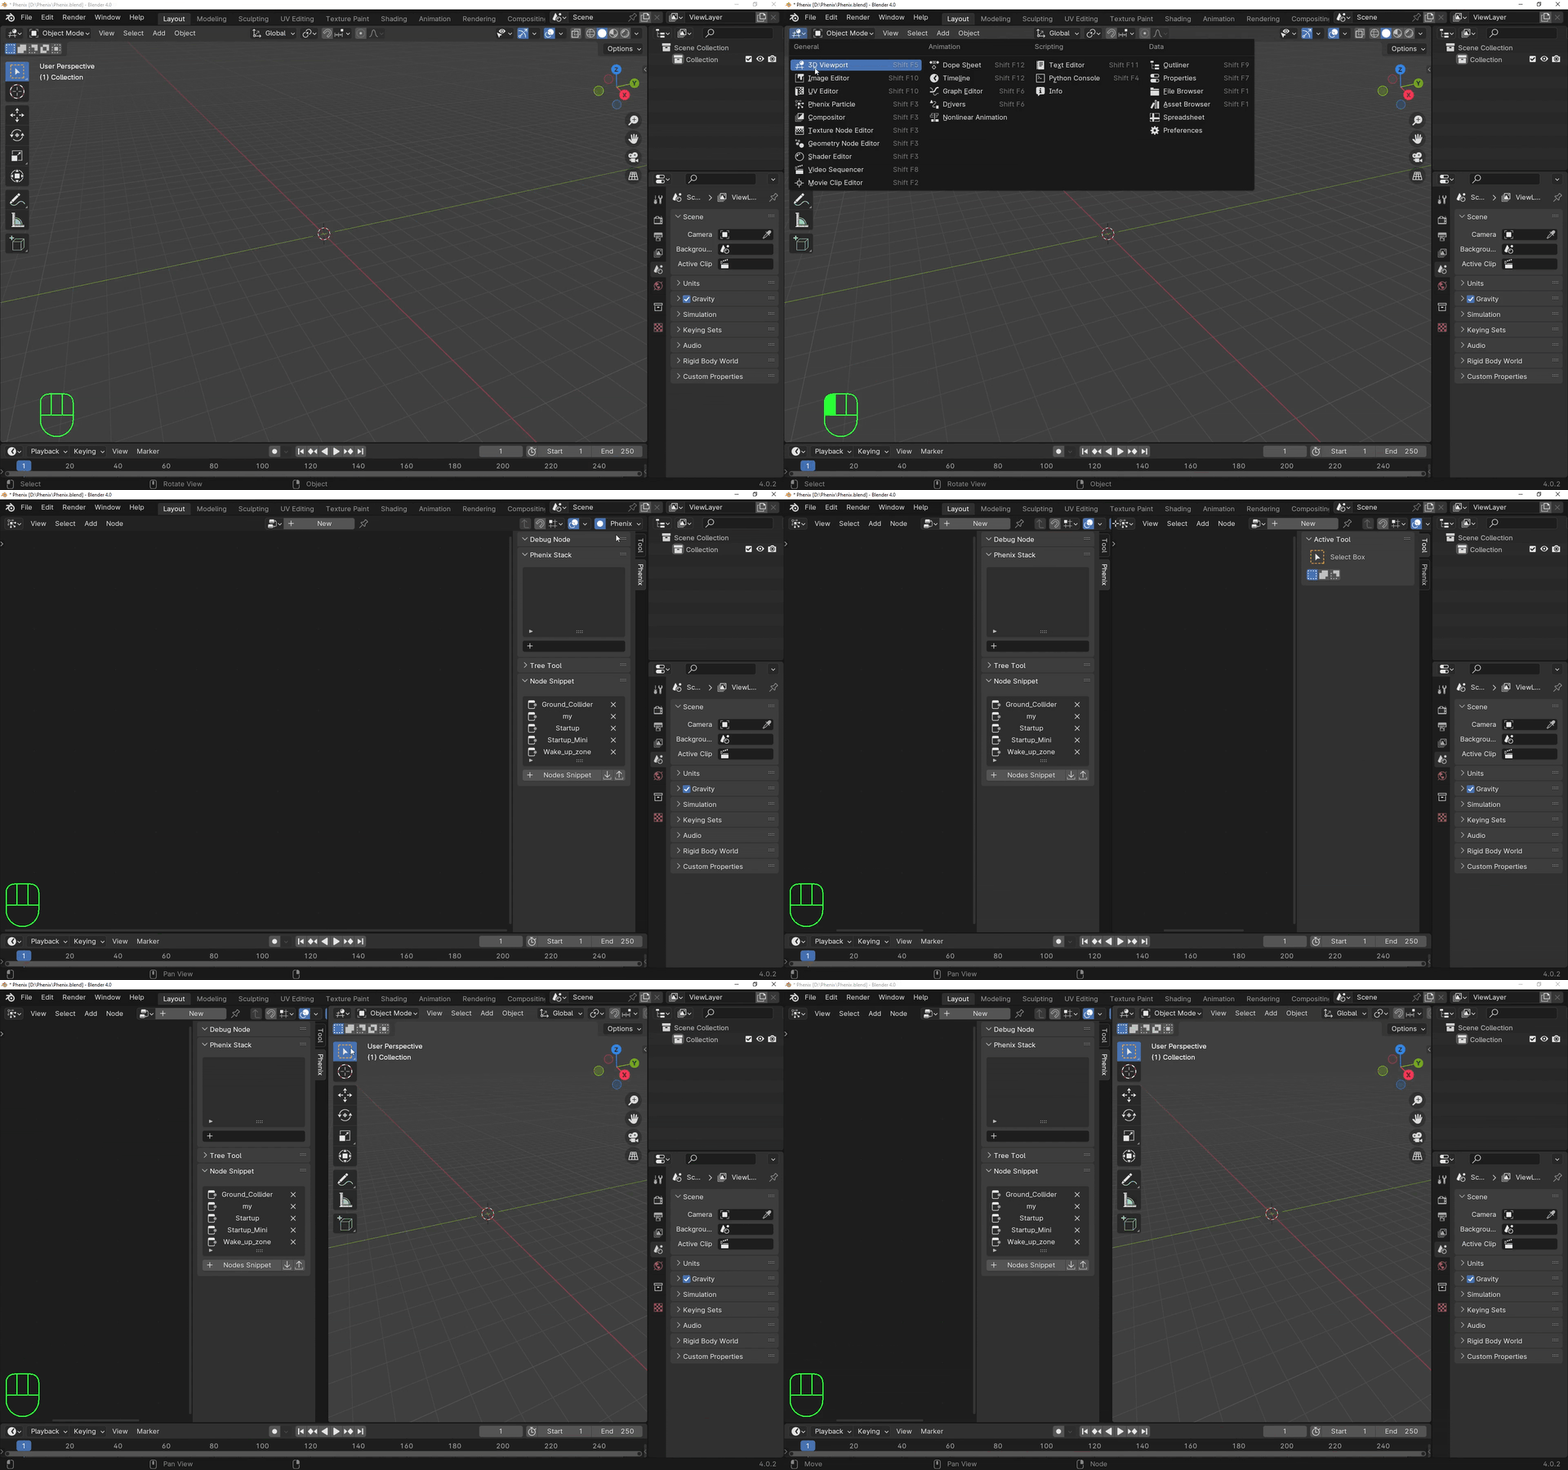
Creating a Node Tree
Creating a Node Tree and adding nodes to that Particle Node Tree exactly like in the way you do it in Shade Editor.
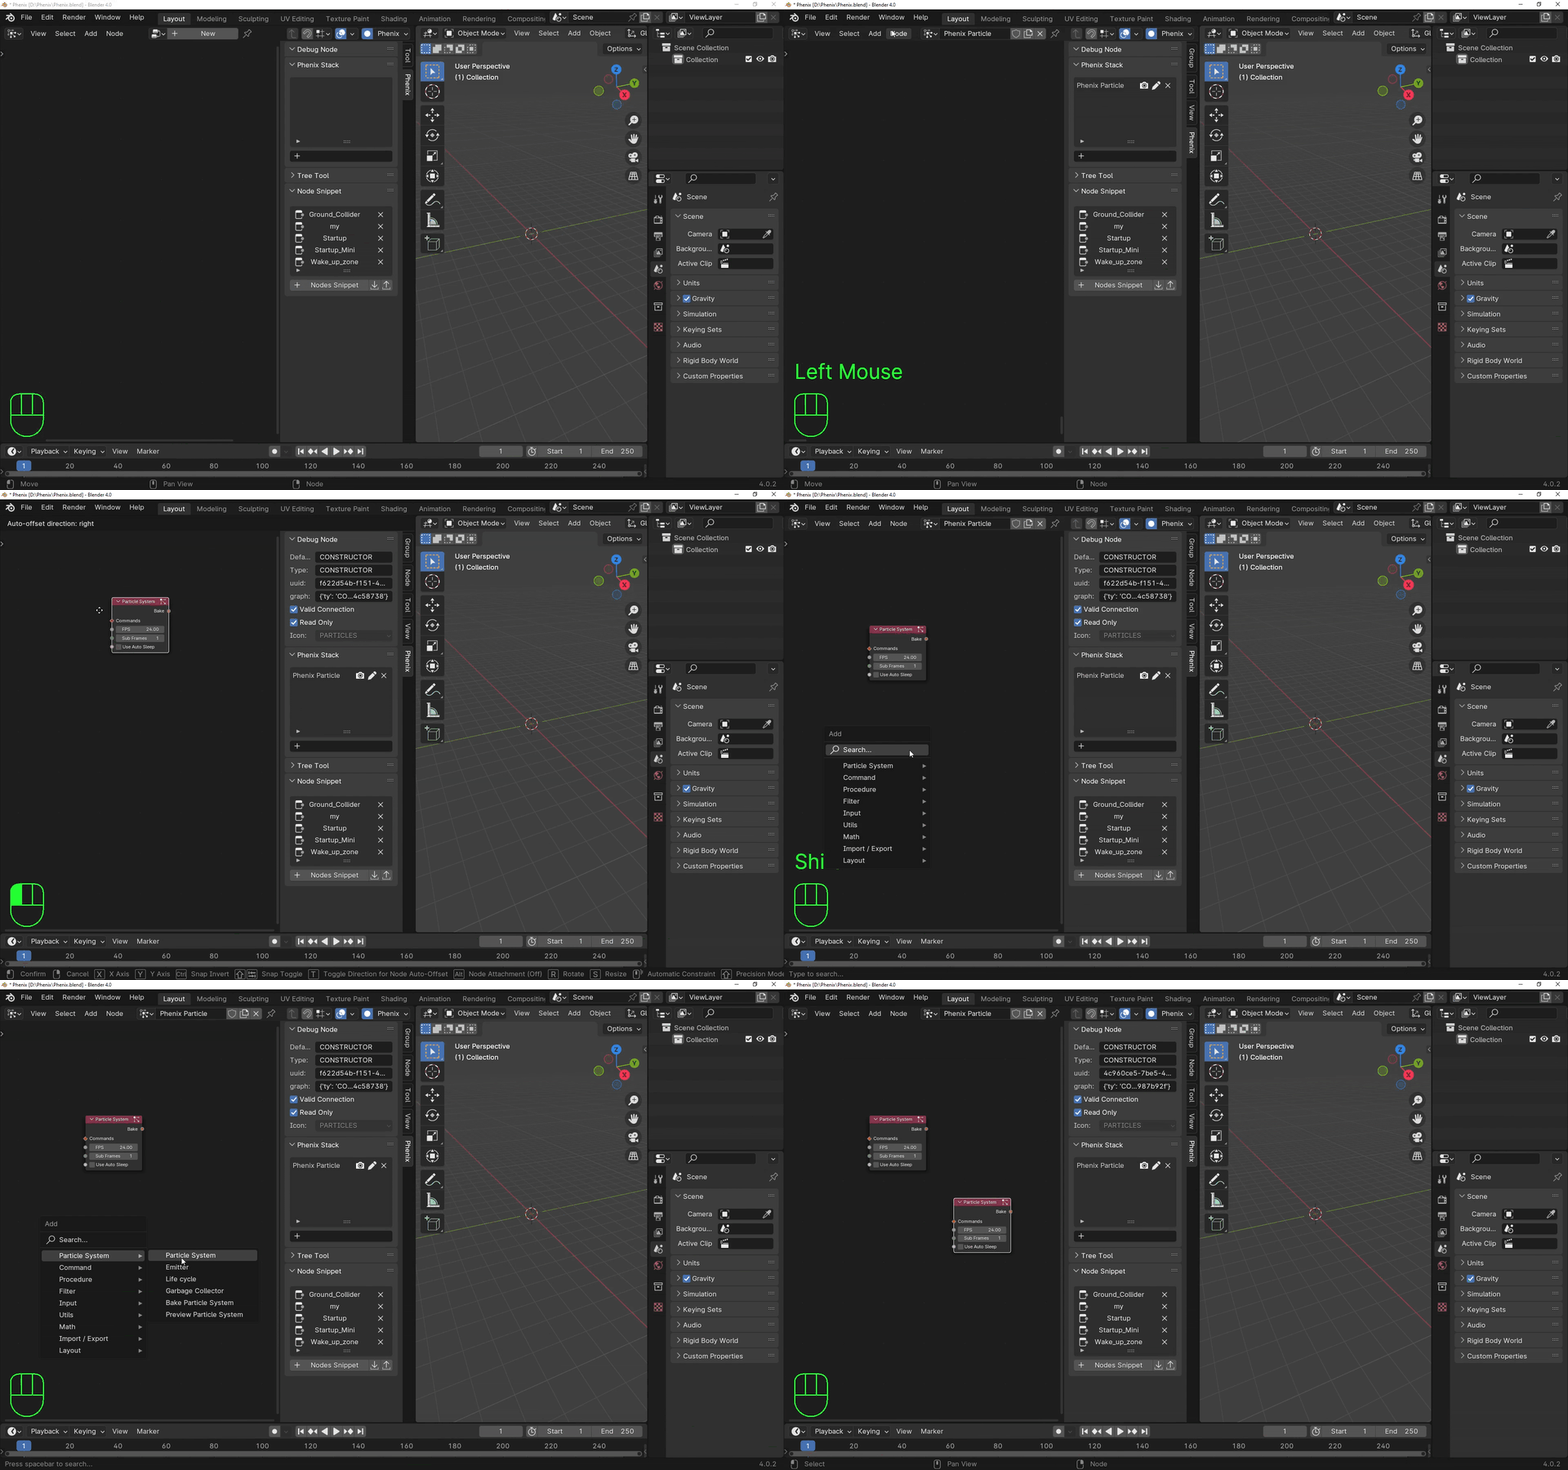
Exploring Phenix Stack Features
As you create Node Trees, they seamlessly integrate into the Phenix Stack, offering a centralized hub for managing your particle animations. Here’s a guide to exploring and leveraging the features within the Phenix Stack
Icon Functionality
Camera Icon:
The Camera Icon offers a convenient option to manage the visibility of the selected node tree in the 3D Viewport.
Here’s how you can use it:
- Left-clicking on the Camera Icon allows you to toggle the visibility of the selected node tree within the 3D Viewport.
- When activated, the animation becomes visible, providing a real-time preview of its effects on your scene.
Edit a node tree:
Selecting a node tree (clic in the name) automatically switch to the graph.
Here’s a clear explanation:
- Simply clicking on the name activates the edit mode for the chosen node tree, allowing you to make adjustments, add or remove nodes, and refine your particle animation setup.
- Ctrl + Click: Turns on the visibility of the animation for the selected node tree, simultaneously turning off the visibility of the animation for the previously active node tree.
- Shift + Click: Turns on the visibility of the animation for the selected node tree, leaving the visibility of the animation unchanged for the previously active node tree.
- This ensures that modifications are intentional, providing a safeguard against unintended changes while navigating through node trees.
Cross Icon:
The Cross Icon offers a straightforward way to remove a node tree from the stack and will therefore not be evaluated.
NOTE: Any modifications made to the Node Trees or their individual nodes take effect when you play the animation from the beginning. This ensures that you observe the real-time impact of your modification in the 3D Viewport.
Flow Control — per-modifier frame range
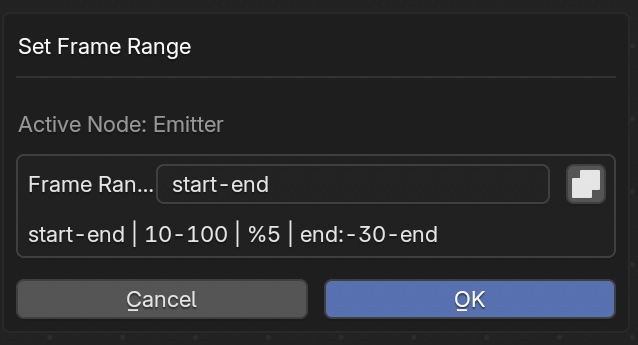
Every command node (force, modifier, constraint, spawner, …) carries a Frame Range property that controls the window during which the node is active. Press [F] on the active node to open the editor and type the expression; tick Apply to Selection to set the same range on every selected node at once. Frame Range replaces the v4 stage assignment that used to live on this shortcut — stages are now internal, see GPU Architecture (v5) above.
Frame Range lets you sequence effects on the timeline without drivers or muting: a gust of wind from frame 60 to 90, a periodic emission every 5 frames, last-second damping over the final 30 frames, … The expression is checked every frame and the node is skipped entirely on frames where it does not match.
Frame Range mini-language — grammar:
| Syntax | Meaning | Example |
|---|---|---|
start-end / frame / empty | Always active (default). | start-end |
N-M | Inclusive integer range. | 10-100 |
start, end, mid / half | Scene boundary variables (mid = (start+end)/2). | mid |
var:K / var:-K | Variable shifted by integer offset. | end:-30 |
var1:K-var2:K | Range with offsets on both endpoints. | start:10-end:-10 |
%N | Periodic: fires every N frames counted from start. | %5 |
%N:K | Periodic with phase offset K. | %10:3 |
a, b, c | OR-composition: matches any of the comma-separated parts. | 10-20, 50, %5 |
Dynamic vs. hardcoded:
start, end and mid track
scene.frame_start / scene.frame_end — if
the artist later changes the scene range to 10 – 300,
any node using start follows automatically. Integer literals
like 1, 10-100 or 1-1 are
absolute frames: they keep firing on the exact same
numbers regardless of the scene range. Prefer
start/end in shared snippets and node libraries;
use integer literals only when you really mean a fixed timeline anchor.
Worked examples (scene range 1 – 250):
| Expression | Fires on |
|---|---|
start-end | All 250 frames (default; same as empty). |
10-100 | Frames 10 to 100 inclusive (91 frames). |
end:-30-end | The final 30 frames (220 to 250). |
%5 | Every 5 frames from start: 1, 6, 11, 16, …, 246 (50 frames). |
%10:3 | Phase-shifted by 3: 4, 14, 24, …, 244 (25 frames). |
mid | Exactly one frame: the scene midpoint (125). |
1-50, 200-end | Intro window plus tail: 1–50 and 200–250 (101 frames). |
start:10-end:-10, %25 | Trimmed window 11–240 OR every 25 frames (231 frames total). |
Tip: the expression is
validated as you type. If the parser rejects it (unknown variable, missing
number, zero period, …) the node label is prefixed with
“⚠ ” and the error is reported through the viewport overlay,
so a broken Frame Range never reaches the GPU.
Exploring Node Snippet Features
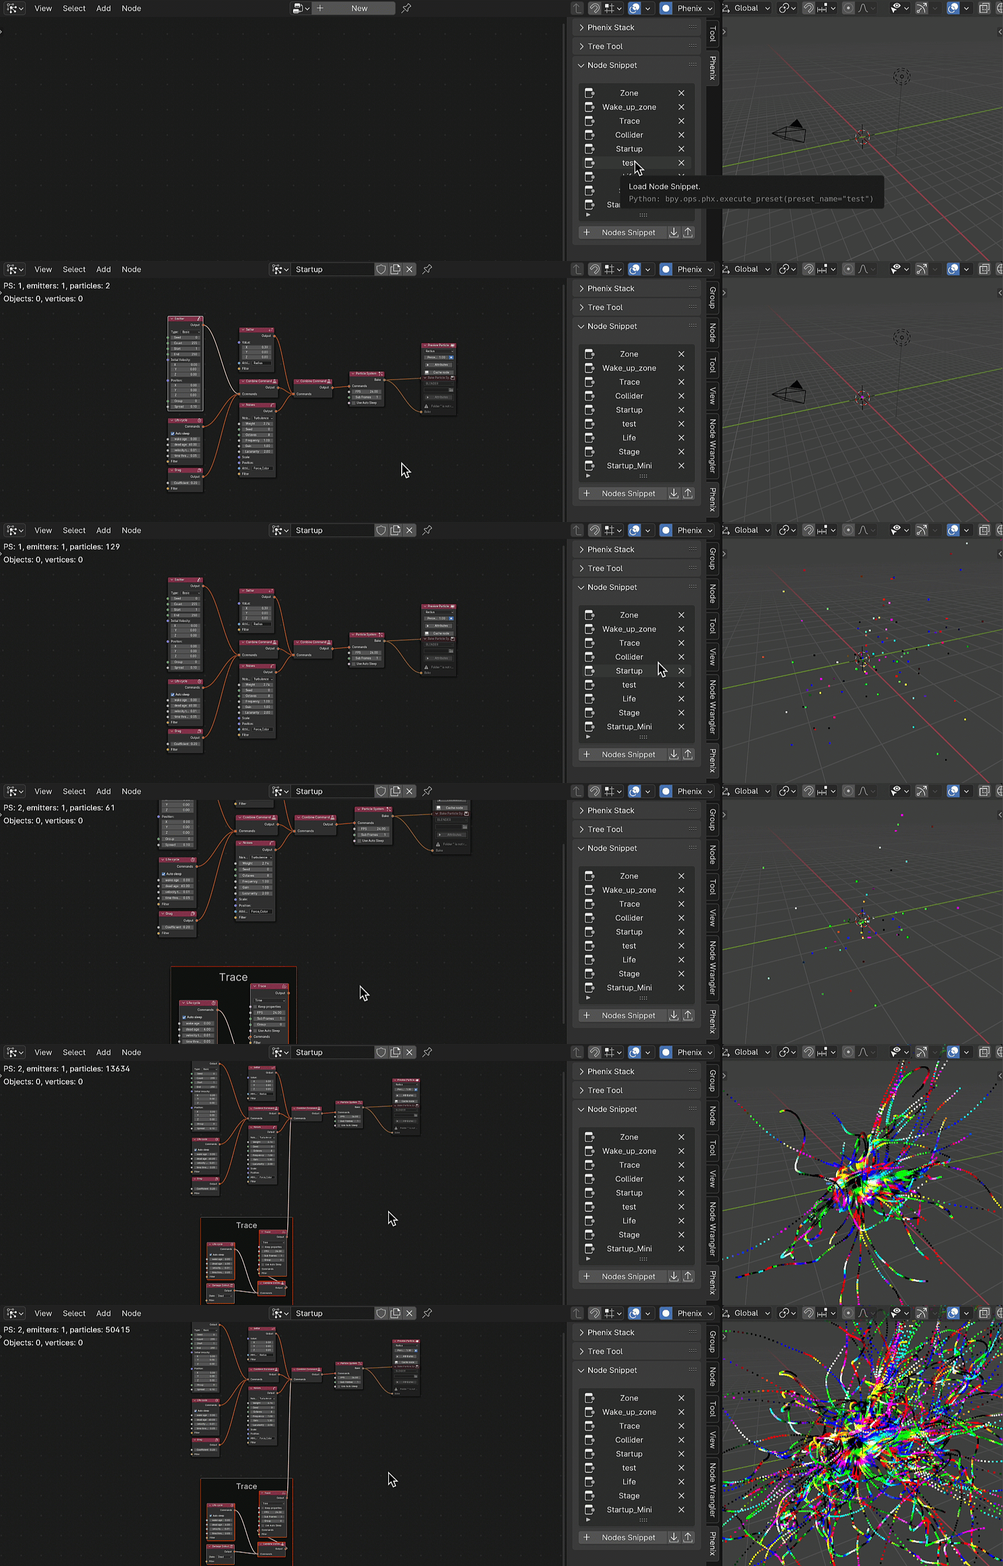
Node Snippet in Phenix Particle is a powerful tool designed to simplify your particle animation workflow. It functions like a preset, offering numerous features to enhance your creative process.
Here’s how you can leverage the capabilities of Node Snippet:
Preset Node Groups:
Node Snippet contains various pre-arranged groups of nodes, serving as presets. Choose the node group that aligns with your project requirements to kickstart your animation effortlessly.
Create Custom Node Snippet:
Tailor Node Snippet to your needs by selecting specific nodes and creating custom groups. This feature allows you to efficiently organize and reuse node setups in future projects.
Export and Share:
Share your creative setups by exporting Node Snippet. This enables collaboration and allows others to benefit from your unique configurations. We chose the .json format to export the Node Snippet because it is widely used for storing and exchanging structured data. It’s easy to share, for example by email, takes up little space, and is human-readable.
Import Node Snippet:
Likewise, enrich your library by importing Node Snippet shared by others. Expand your toolkit and experiment with diverse node configurations.
Delete Unwanted Snippets:
Maintain a clutter-free workspace by deleting Node Snippets that are no longer needed. This ensures a streamlined and organized Node Snippet library.
Node Snippet is your go-to resource for accelerating your particle animation projects, offering flexibility, collaboration possibilities, and efficient management of your creative assets in Phenix Particle.
Baking the Particle Animation
Before initiating the particle animation baking process in Phenix, ensure you
follow these steps for a smooth experience:
Save Your Blend File:
Begin by saving your Blender project file to secure your progress.
Un-Mute the Bake Particle System Node:
If the Bake Particle System Node is muted (if it is, the node will be greyed out), unmute it by pressing the ‘M’ key on your keyboard. This ensures the system is ready for baking.
Set Path in Bake Particle System Node:
Access the Bake Particle System Node and set the desired path for the animation bake. This defines where the baked data will be stored.
Initiate Baking:
To commence the baking process, add a “Bake Particle System” node and toggle the “attributes” button to select the properties to send to the geometry node. You then have the option to bake by clicking the “Bake” button on the node, or to bake the entire stack using the operator under the Stack panel.
NOTE: The particles system preview node works the same way to accelerate the playback speed, with the difference that it will write a cache in the machine’s temporary folder. This file will be deleted as soon as the particle system is baked. Or if you use the remove (all) cache operator under the stack panel.
Final setting for Rendering the Animation
As you approach the final stages in Phenix, prepare for rendering by making a small adjustment in the modifier. as illustrated in the GIF
Here’s the reasons you need to do this manually at the end:
Render Optimization in Cycles:
Phenix Particle is optimized for rendering billion-point clouds in the Cycles render engine. Leverage this efficiency when working with extensive particle setups.
Eevee Considerations:
Note that the optimized cycle setting may not be supported in Eevee. In such cases, instances or alternative models can be used to achieve performance with reduced computational demands.
Instance Replacement:
Consider replacing mesh instances with lightweight models, such as a fly model for intricate patterns or a bird for boid FX simulations. This helps balance performance and visual impact.
Integrating Rotation Nodes:
Introduce rotation nodes within the particle graph and bake rotation attributes for instances. This enhances control over the orientation of the instances, crucial for achieving specific visual effects.
By understanding these considerations and manually adjusting settings as
needed, you tailor Phenix Particle Animation to meet the specific demands of
your particle animation, rendering efficiently across different scenarios and
rendering engines.
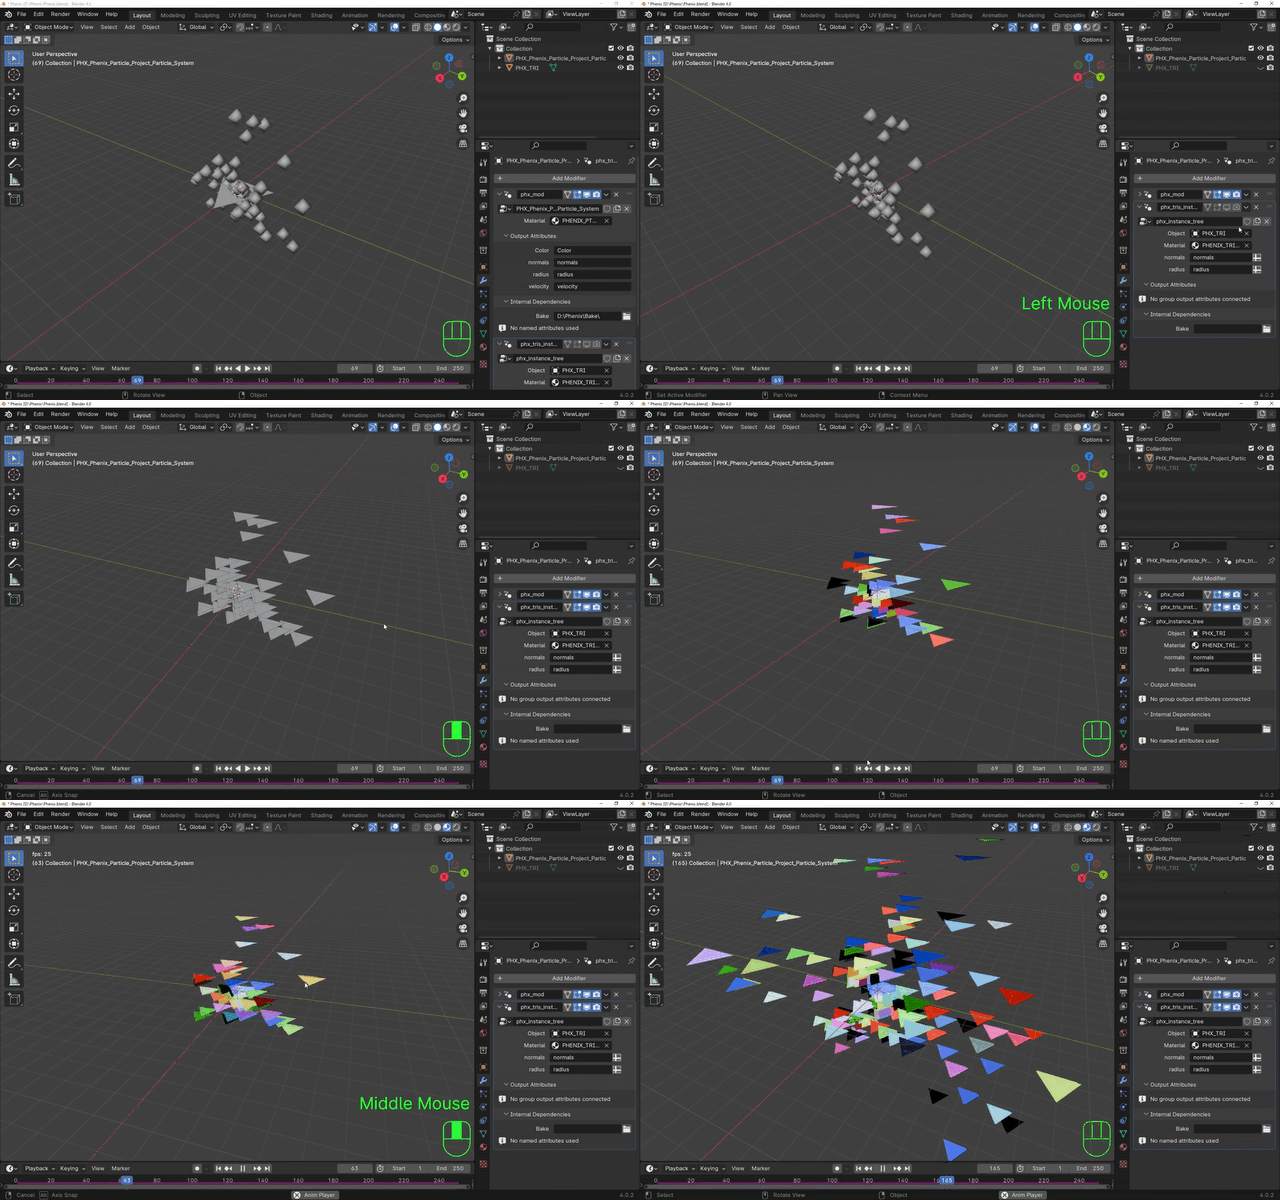
Feature highlights
Error & Warning Overlay
Phenix surfaces simulation errors and warnings directly in the 3D Viewport as a stacked overlay. Red entries are runtime errors coming from the GPU backend, orange entries are warnings (out-of-range socket values, invalid enum, deprecated node). Repeated messages are deduplicated and tagged with an occurrence count, and the overlay auto-clears 30 seconds after the last incident. Socket-level warnings clear automatically as soon as the offending value is fixed and are re-emitted whenever the simulation restarts so you never lose track of them.
Input Limits
Every numeric, string and boolean socket in Phenix declares a min / max range (and where applicable, an enum or regex). Values typed in the UI are clamped to this range with a console message, so no invalid value can reach the GPU. This removes a whole class of NaN / instability bugs caused by user-side typos. Soft ranges (slider bounds) are exposed for fine control, while hard min / max guard the simulation.
Particle Properties (Ptc Props)
Initial particle properties (Mass, Radius, Color RGBA, Temperature, Viscosity, Fuel, Group / child group) are configured on a single Particle Properties node, then shared with every spawner through the Ptc Props input socket. The same Particle Properties node can drive a Particle Emitter, a Spawner Primitive and an Event Spawner simultaneously, ensuring that all particles of a given system share the same initial state.
This replaces the inline Group / Color fields that used to live on the Particle Emitter. The Particle Properties subgraph is now merged into the spawner graph at runtime (previously it was dropped silently).
Filtering workflow
Filtering particles used to be done with a single monolithic Filter node that mixed attribute comparison, spatial selection and logical composition. The workflow is now decomposed into three orthogonal building blocks, each visible in the graph:
-
Source filters — what to test:
- Attribute Filter — comparison on a named particle attribute (
==,!=,<,>,<=,>=,% == 0,Sin). - Zone — spatial selection based on an SDF / object proximity.
- Attribute Filter — comparison on a named particle attribute (
-
Composition — how to combine multiple filters:
- Combine Filter — operation dropdown:
MUL (AND),OR,SUB,ADD. Falloffs are blended through multiplication, max, clamped subtract or clamped sum.
- Combine Filter — operation dropdown:
- Application — every Command node accepts a Filter input socket and uses the resulting falloff to weight its effect per-particle. There is no hidden filter mode inside modifiers.
Worked example: filter particles whose temperature is above 50 AND that are inside a Zone, then plug that combined filter into a Drag node to slow only the hot particles inside the zone.
Note: the original
Filter and Filter Operation nodes are deprecated.
They are flagged as such in the Add Node menu and will be removed in a later
release.
Custom Shader
The Custom Shader node lets advanced users write their own
WGSL compute kernel and have it compiled live. Five built-in templates ship
with the addon — Force, Impulse, Direct,
Sample-Image, Mesh-Vertex — loaded from the Rust
backend through the Load Template button. The kernel can be opened in
Blender’s Text Editor (Edit in Text Editor) and Phenix maps any
compile error back to the line inside your user_compute()
function.
Dynamic + / - sockets let you bind up to four images,
four audio inputs, four objects and eight animatable parameters. The output
type selector picks how the kernel result is fed back into the simulation:
Force, Impulse, Direct (overwrite a channel), or
Position. A neighbor-access toggle exposes the spatial neighborhood
to the kernel.
Built-in diagnostic nodes
Phenix ships with a small toolbox of diagnostic nodes that you drop straight into the node tree to inspect the GPU simulation live, without leaving the editor. Wire any of them to a Particle System output and the readout draws itself in-place on the node.
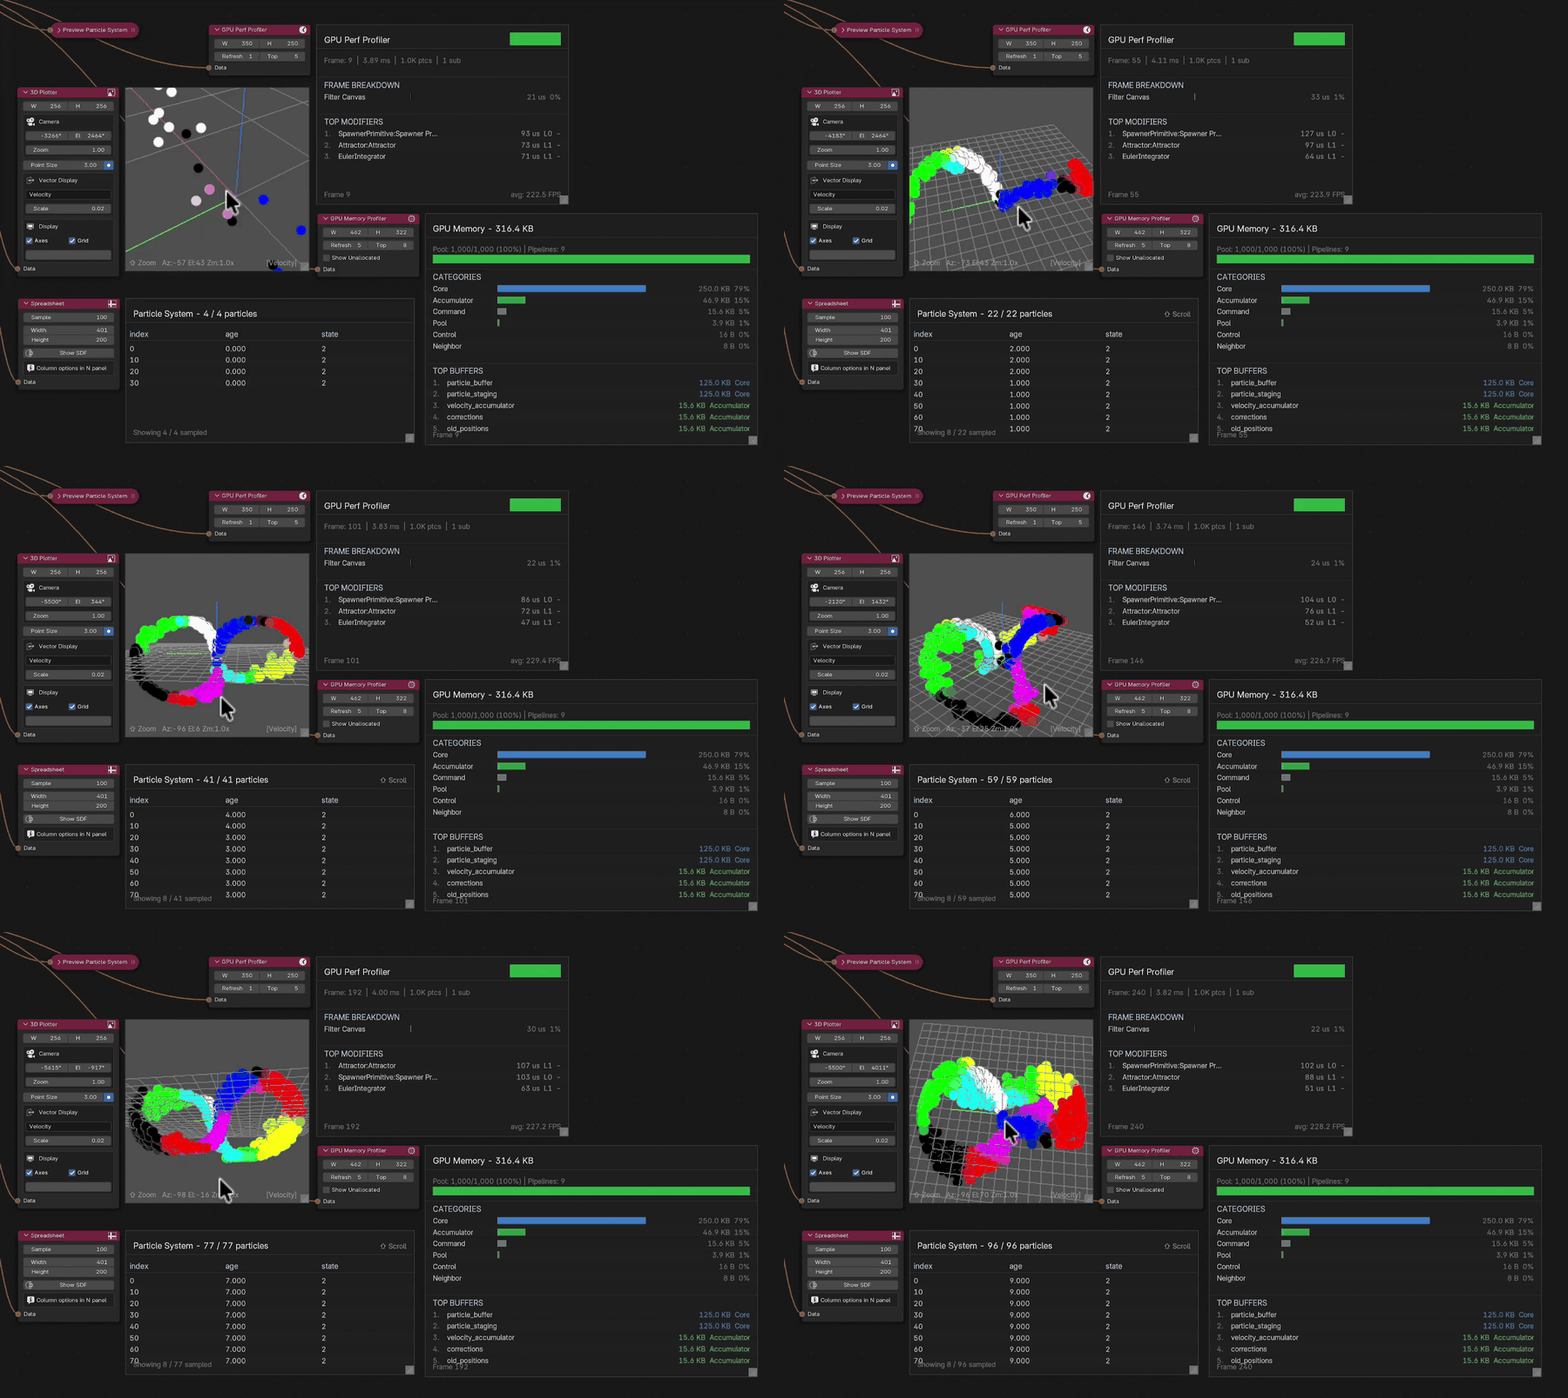
- 3D Plotter — GPU-rendered 3D plot drawn straight into the node editor with an auto-camera. Drag Azimuth / Elevation to orbit around the cloud, tweak Zoom (1.0 = auto-fit), switch to STICKS mode to draw the velocity or normal vector per particle. Great for debugging procedures and vector fields without ever round-tripping to the CPU.
- GPU Perf Profiler — real-time FPS and total frame time, plus a per-category timing breakdown (Neighbor Build/Search, Filter, Accumulator Clear, Forces, Euler, GPU Sync) and a top-N list of the most expensive modifiers. Raise Refresh Rate to cut profiling overhead when chasing a hot loop.
- GPU Memory Profiler — breakdown of GPU buffer memory by category (Core, Accumulator, Cache, Neighbor, Specialized, Command, Pool, UserProps, External, Control), a pool-efficiency bar comparing active vs. capacity, and the top-N most expensive buffers. Toggle Show Unallocated to expose unused slots; sort by Size to find the heaviest, by Category to group them.
- Spreadsheet — tabular view of any particle attribute, frame by frame: built-in groups (core, position, velocity, lifecycle, physics, fluid, visual) plus every custom attribute declared with a Custom Attribute node. Pick which columns are visible from the N-panel sidebar; Sample Count controls how many particles are drawn.
Phenix Parameters panel — live tweaking in the 3D viewport
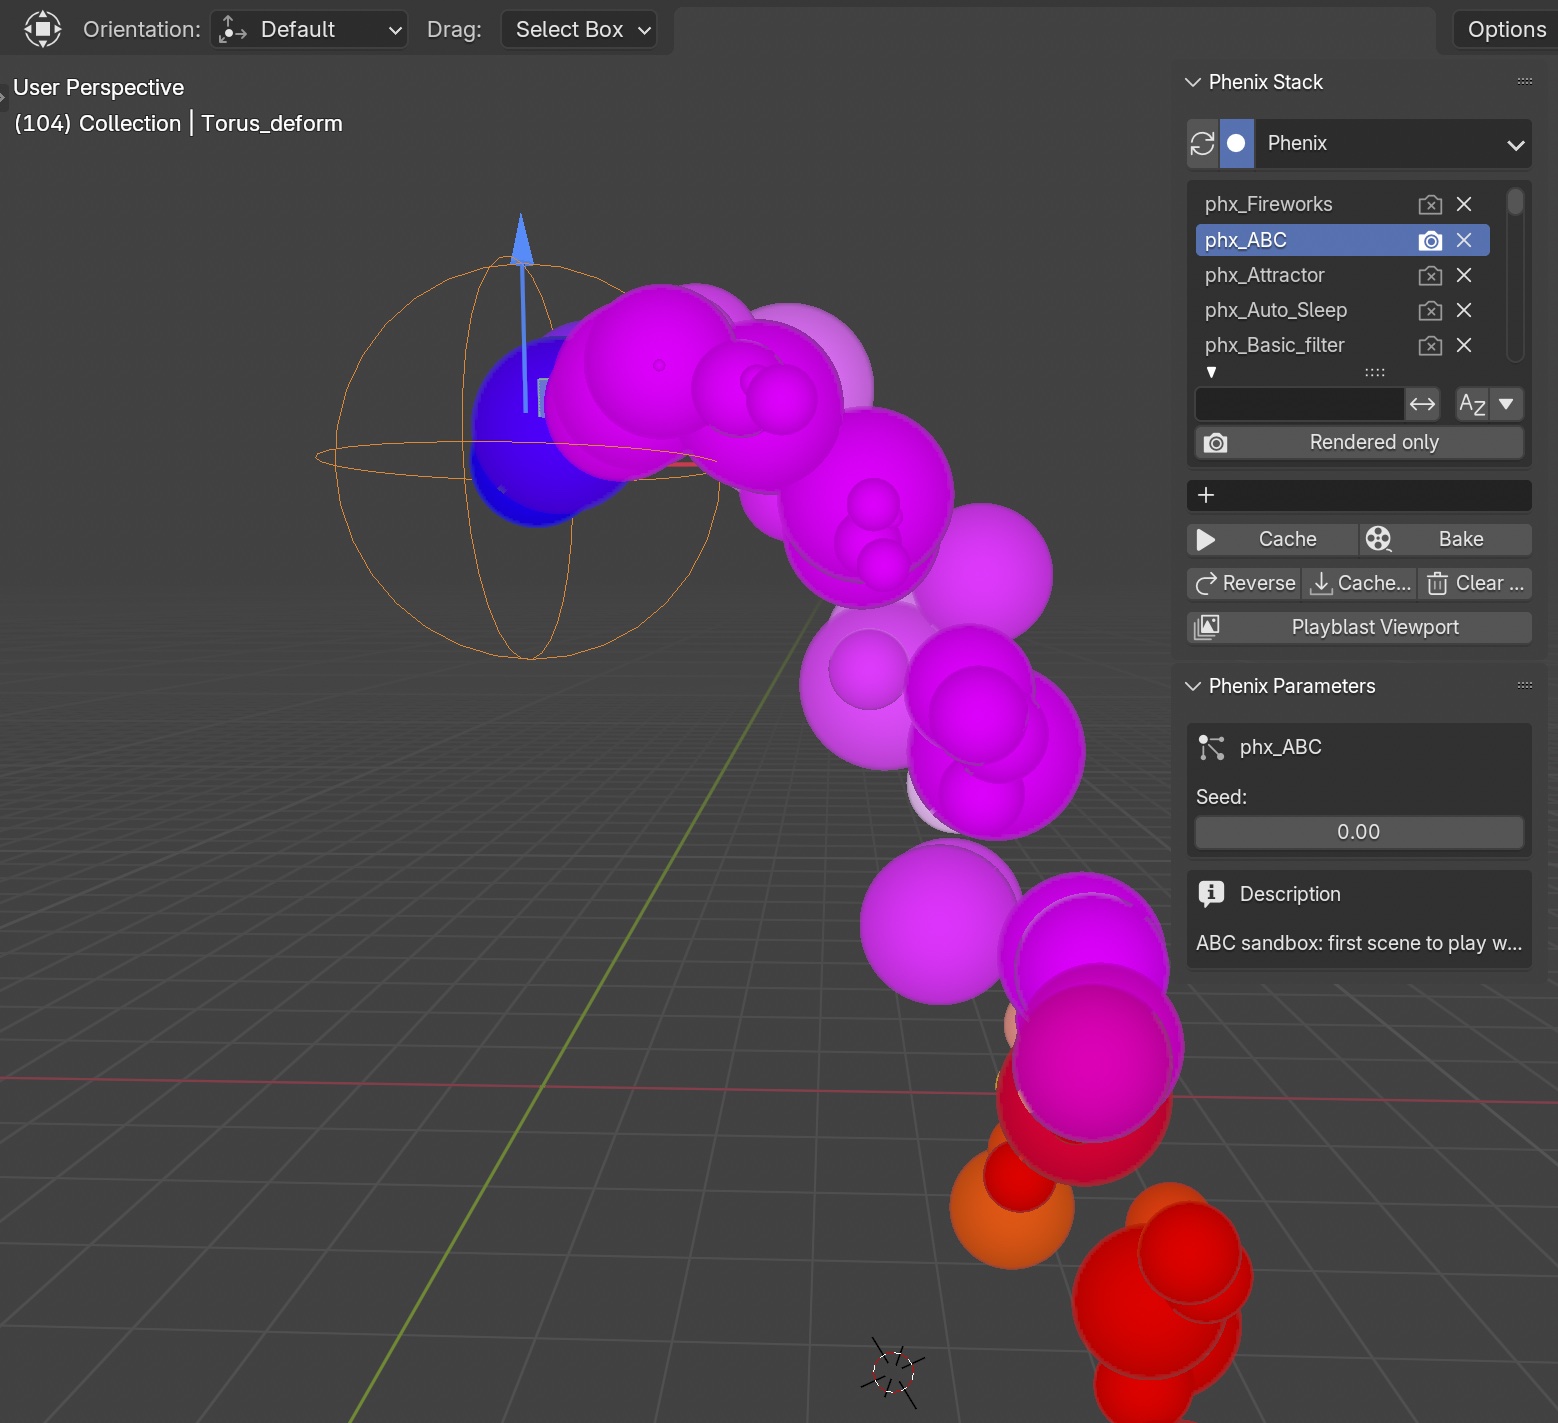
v5 brings two dedicated panels directly to the N-sidebar of the 3D viewport, so you no longer have to dock the node editor while tweaking a simulation:
- Phenix Stack — the list of every particle tree in the file. Switch the active simulation in one click, toggle the per-tree Rendered only visibility, jump to Cache, Bake, Reverse, Cache export, Clear or Playblast Viewport, and sort or filter the stack alphabetically.
- Phenix Parameters — every Parameter node in the active tree is surfaced here as a named, typed control (Float, Vector, Color, Int, Bool, Object, Material, String). Move the sliders while the simulation plays and the value is uploaded as data — the GPU shader is never recompiled, so the response is instant. Each parameter carries the node description and an optional icon so the artist working in the viewport never needs to find the node in the graph again.
Pair this with keyframes on a Parameter node to animate the effect from the Dope Sheet without touching the node tree.
Keyframes on any socket also work
directly. Right-click any Float, Int, Bool, Vector, Euler
or Color input on any Phenix node → Insert Keyframe, and the
addon evaluates the FCurve on every frame change. For
#driver expressions, keep using a Parameter node:
Blender’s depsgraph never ticks our custom tree, so a driver placed
directly on a tree socket is silently ignored — while a driver on
the Parameter store is evaluated normally and the node mirrors the
result onto its output.
Enriched in-editor help
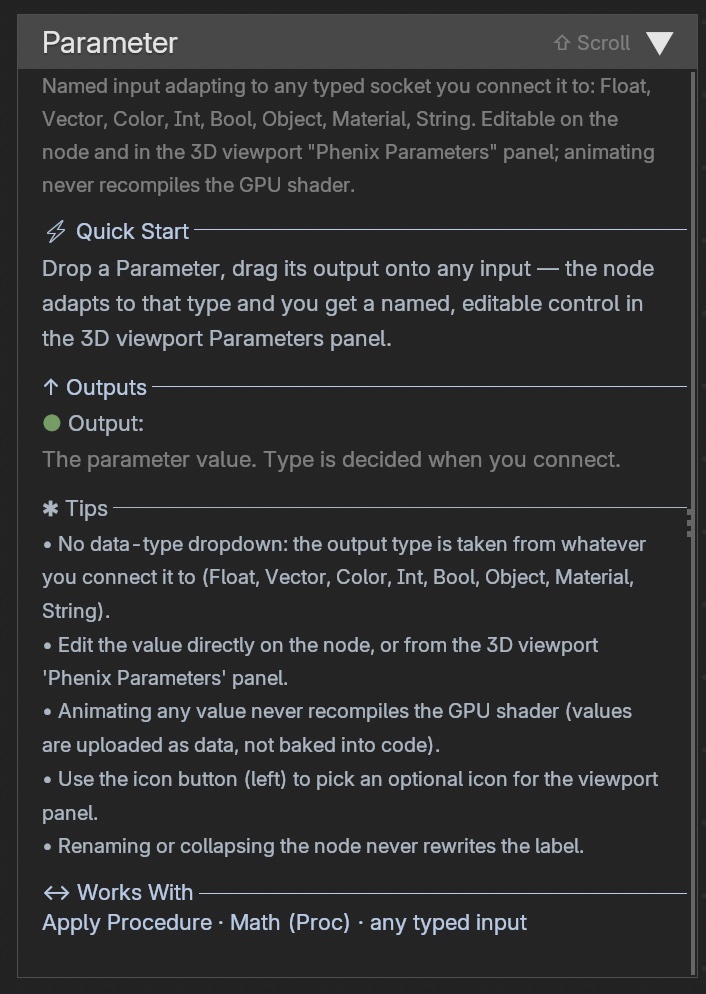
Every Phenix node now ships a structured help payload —
title, doc, quick start, inputs,
outputs, tips and works with — rendered in
a scrollable Parameter panel docked next to the node
editor. The same payload is exposed to AI assistants through
blender_get_node_help, so an assistant and an artist read
exactly the same documentation and stay in sync.
- Quick Start — one-paragraph recipe to use the node correctly.
- Inputs / Outputs — each socket with its type, range and meaning.
- Tips — calibration advice and known pitfalls.
- Works With — the nodes typically wired upstream or downstream.
Constraint material presets
The Constraint Advanced node ships with a curated list of material presets — Silk, Cotton, Denim, Leather, Rubber, Hair, Chain, Jelly, Metal Wire — that pre-fill stiffness, damping, tension, exponent and per-link randomization with values calibrated against the new Hooke solver. Plug the Constraint Advanced node into the Settings input of a base Constraint to apply the preset; the values are then baked into the Constraint sockets so they survive unplugging.
Learn and iterate faster with AI
Phenix can talk to AI assistants. Once you switch the integration on, an assistant like Claude — or any MCP-compatible tool, including your own scripts — can read your node graph and the live simulation state, explain what each node does, suggest setups, build a starter graph for a given effect, or debug your simulation. You describe what you want from your usual chat window; the assistant does the inspection and editing inside Blender for you, and you watch the result update in your viewport.
What it unlocks for you
- Learn faster. Ask the assistant what a node does or what each socket is for. It pulls the documentation and shows it inline, with examples drawn from your current graph.
- Build faster. Describe the effect you want («a smoke trail with turbulence and lifetime», «a cloth with PIN at the top corners»), and the assistant creates the nodes, wires them, and sets sensible defaults.
- Debug faster. «Why aren’t my particles bouncing off this collider?» The assistant reads the graph and the live frame data — positions, velocities, sockets — and points at the missing link or the wrong value.
- Iterate faster. Tweak parameters, swap nodes, try variations through a chat instead of clicking through panels.
How to enable it
- Open Edit → Preferences → Add-ons → Phenix.
- In the AI / Automation API box, tick “Enable MCP server”.
- Default port:
7788. Change it if it clashes with another local service. - (Optional) Set a token if you want to require a shared secret on every request.
- (Optional) Tick “Allow arbitrary Python execution” to let the assistant run Blender Python directly — powerful, but only enable for assistants you trust.
- Point your assistant at
127.0.0.1:7788. Most MCP-compatible tools will discover the available actions automatically.
Privacy and safety
- The integration listens on
127.0.0.1only — never reachable from another machine, never sent to the cloud by Phenix itself. - Off by default. You decide when it’s on.
- Whatever assistant you connect operates with the same access you’d have manually in Blender; pick assistants you trust.
Full technical reference (every available action, request/response schema,
Python connection example) is in
phenix_particle_sys_addon/MCP_README.md.
Example trees — start from a working scene
The SandBox .blend ships with 31 ready-to-play node trees,
each named phx_* and prefilled with a short description. Use
them as a tutorial: open the file, switch the active tree from the
Phenix Stack in the 3D viewport sidebar, hit play. Each scene is
small enough to read top-to-bottom — copy a snippet of nodes into
your own work whenever one of them clicks.
| Tree | What it shows |
|---|---|
| ABC | ABC first scene to play with. |
| Attractor | Strange attractor, chaotic flow on volume-spawned particles. |
| Auto Sleep | LifeCycle puts settled particles to SLEEP. |
| Basic filter | Basic filter: Zone gates a Setter. |
| Boid | Boid flocking for organic variation. |
| Charge | Electric charge: particles attract or repel by sign. |
| Collider | Particles bouncing on primitive colliders. |
| Combustion | Fire that spreads between hot particles. |
| Constraint | Spring constraints (Hooke) for cloth / soft body. |
| Container Fluide | PBF fluid inside a collider container. |
| CSV | External CSV drives particle attributes. |
| Custom attrs | Custom Attribute: declare a per-particle Vector3, write to it from a proc graph, read it back downstream. |
| Emiter random | Randomize attributes only on fresh particles. |
| Filtering | Setters gated by Zone + CombineFilter. |
| Fireworks | Fireworks: mortar dies at apex → Event Spawner bursts sparks. Single Particle System, group flag separates the two populations. |
| Follow path | Morph along a Bézier path with trails. |
| Gravitation | Planet-style gravitational pull. |
| Image Sample | Image texture drives position / color. |
| Master Filtering | Master filter chain feeding multiple Setters. |
| Morph obj & color | Morph between meshes with color transfer. |
| Proc | Apply Procedure piloted by object attributes. |
| Proc Fire Like | Fire-like effect without the Combustion node. |
| Proc Sound | Audio-reactive: WAV amplitude drives attributes. |
| Proc Vec Surface | Tangent flow along a mesh surface. |
| Proc vec Follow topo | Tangent flow along a mesh surface. |
| Reaction | Reaction-Diffusion + conditional Setters. |
| Shader | Custom WGSL shader modulated by Noise. |
| Tracer Link | Tracer Links: trails between neighbours. |
| Tracer Tracer | Classic Tracer trail with full lifecycle. |
| Vortex | Tornado vortex around an object. |
| Wake Gravity | Spawn asleep, wake inside a Zone. |
Overview of Nodes of Phenix:
Phenix features distinct categories of nodes, acting as the building blocks where creativity comes to life in animations. These categories are like specialized tool sets, each unlocking unique capabilities for shaping and refining your creation of animation. Let’s take a closer look at these categories, breaking down the technical aspects into easily understandable terms.